What is the problem?
Currently, the Polyend Play+ only has one basic playback mode, which is One Shot.
What should this feature achieve?
The idea is to add two separate playback modes, Gate and Virtual Slice. They must close automatic loop slicing and note length control.
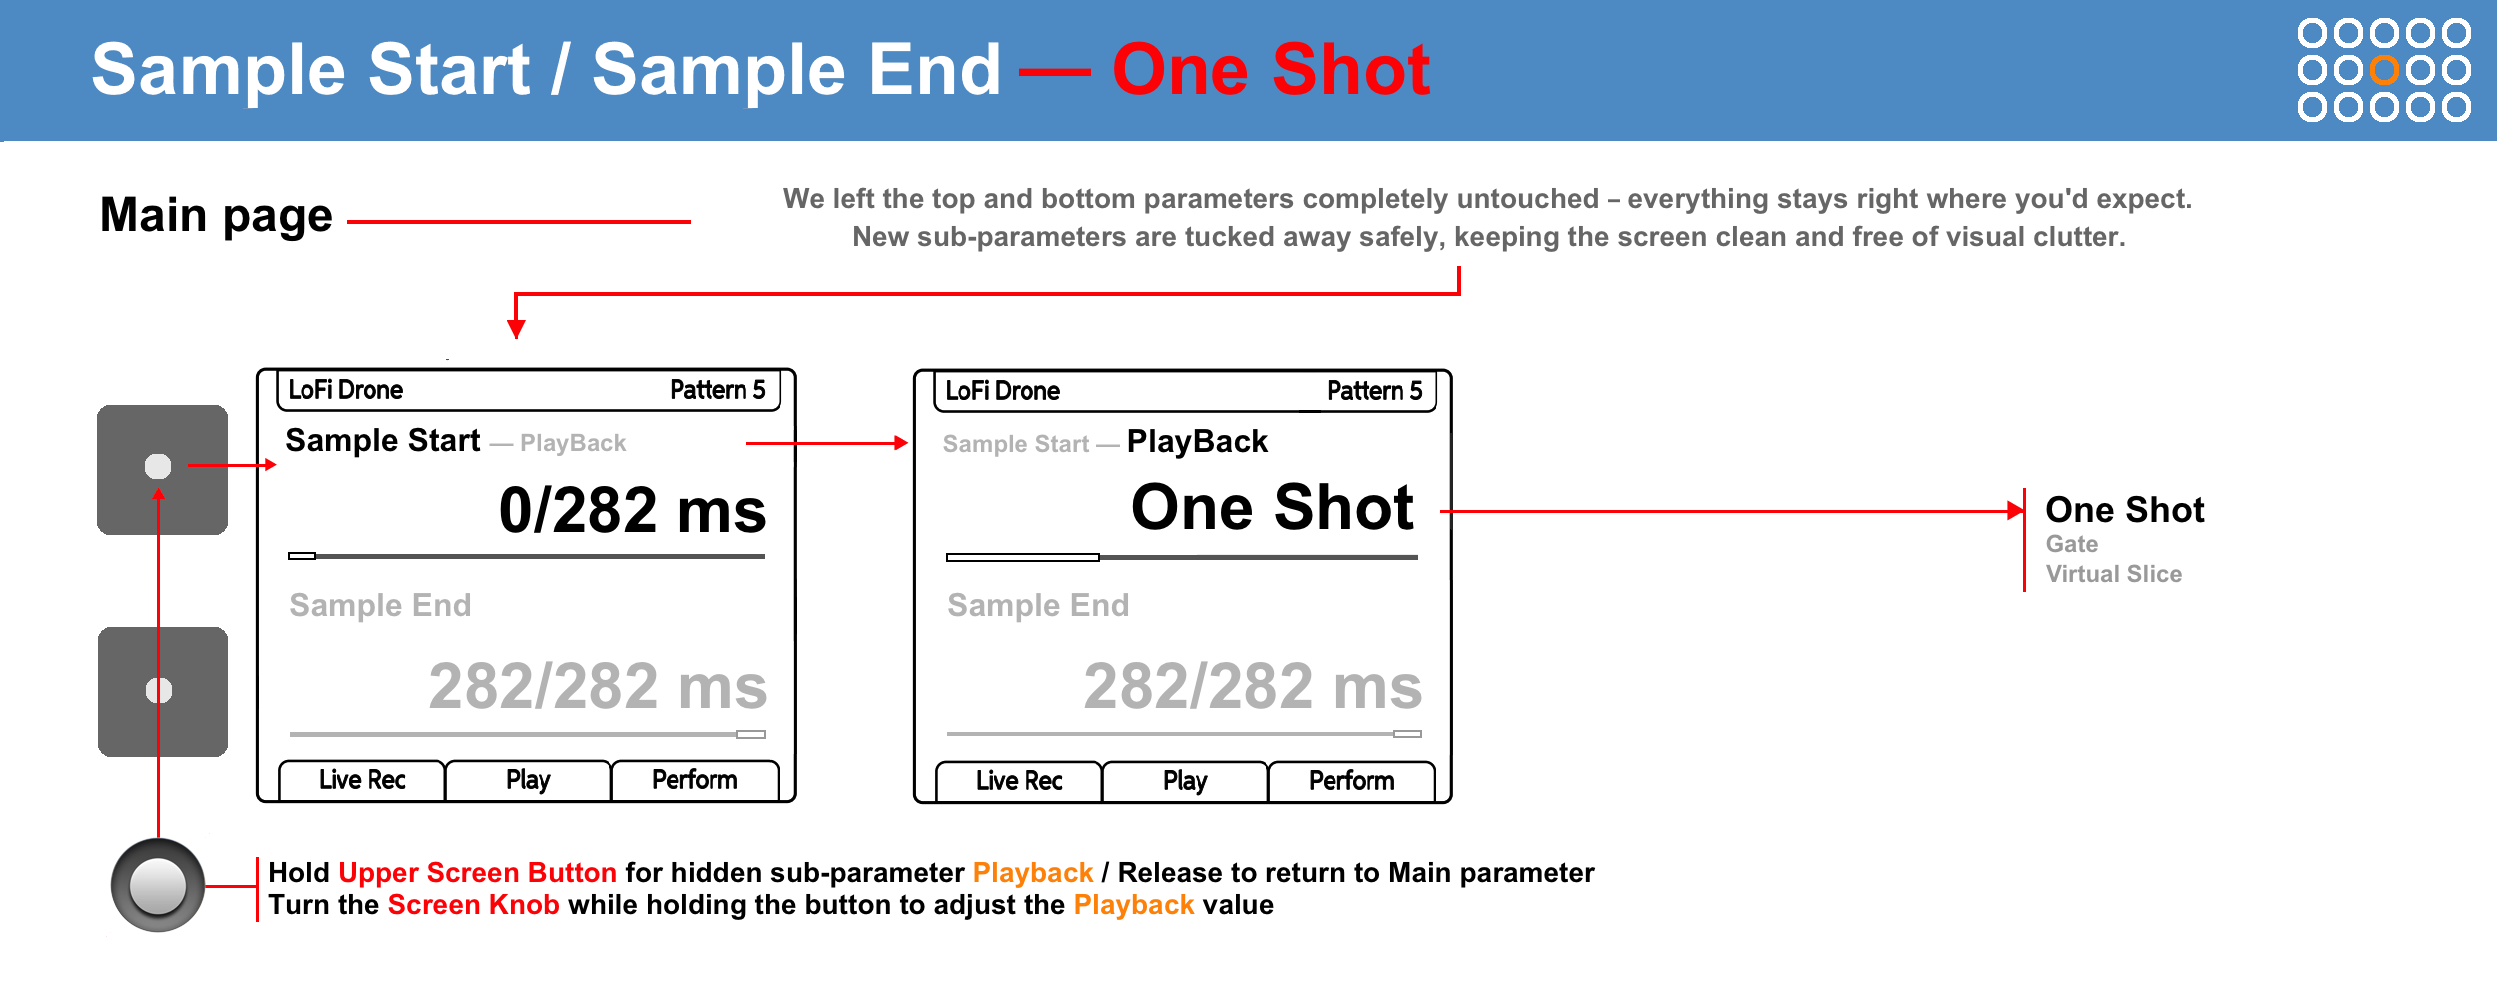
One Shot - is the single and primary sample playback mode, the baseline for Polyend Play and Play+. Its logic and code must not be touched under any circumstances, everything should work without changes.
This approach guarantees developers and users 100% backward compatibility. Any old projects will sound identical upon loading. Right now, this name is not on the screen in the firmware, as the device always works with one-shot by default.
If we want to propose the idea of adding new sample playback modes, this mode needs to be labeled as One Shot - which is exactly what it is.
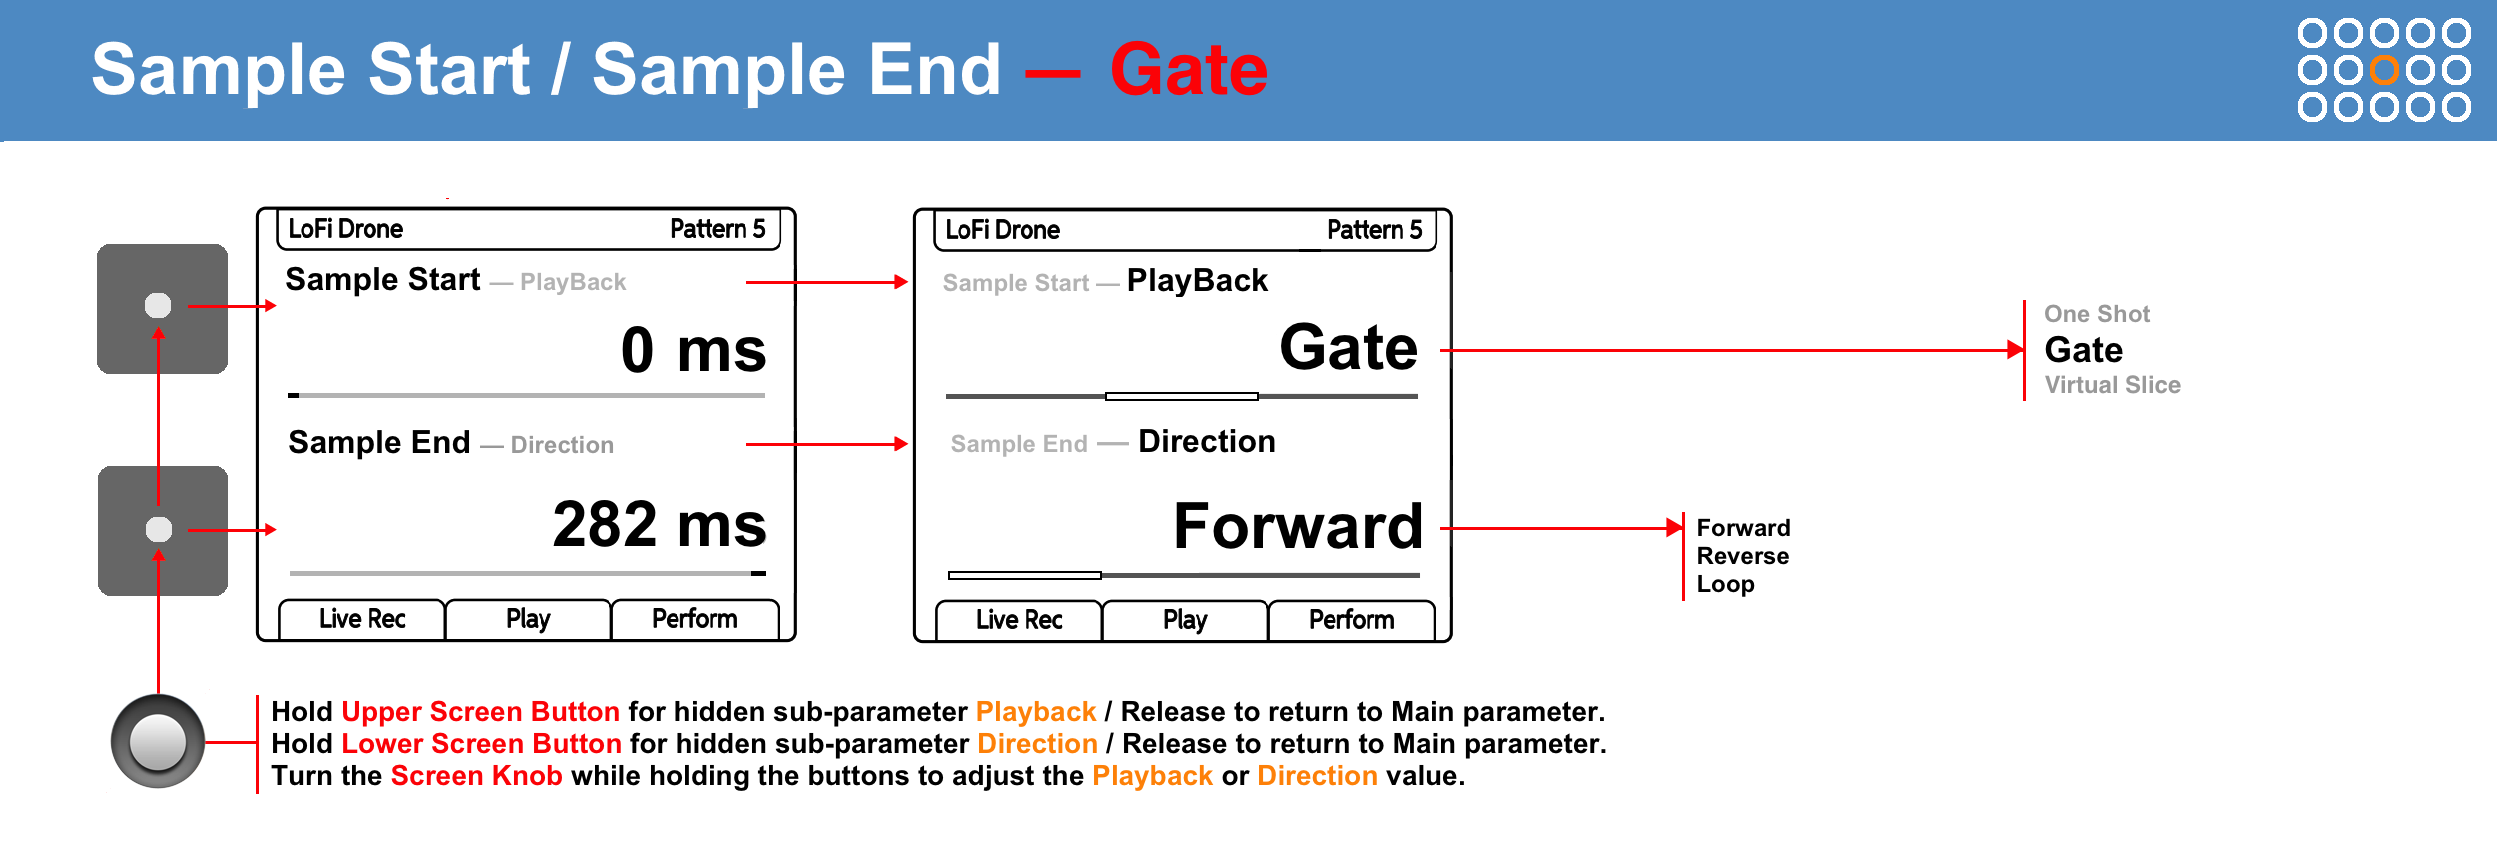
GATE - Note Length Control Mode
Here, the sample sounds exactly as long as the pad is held down or as long as the sequencer step lasts, which is controlled by the note length parameter. As soon as the finger is released or the step ends, the sound cuts off immediately. To prevent clicks during a sharp cutoff, Polyend Play+ already has everything for this — built-in attack (fade-in) and decay (fade-out), which work perfectly within the sample’s start and end points.
For this mode, the note Length parameter is vital; otherwise, the mode simply won’t work. I think it makes perfect sense to place it in the note / Microtune window. The note length here should be measured in familiar fractions: 0.25, 0.50, 0.75, 1 step, and so on — exactly how it is already implemented and working in MIDI mode and on the internal synths.
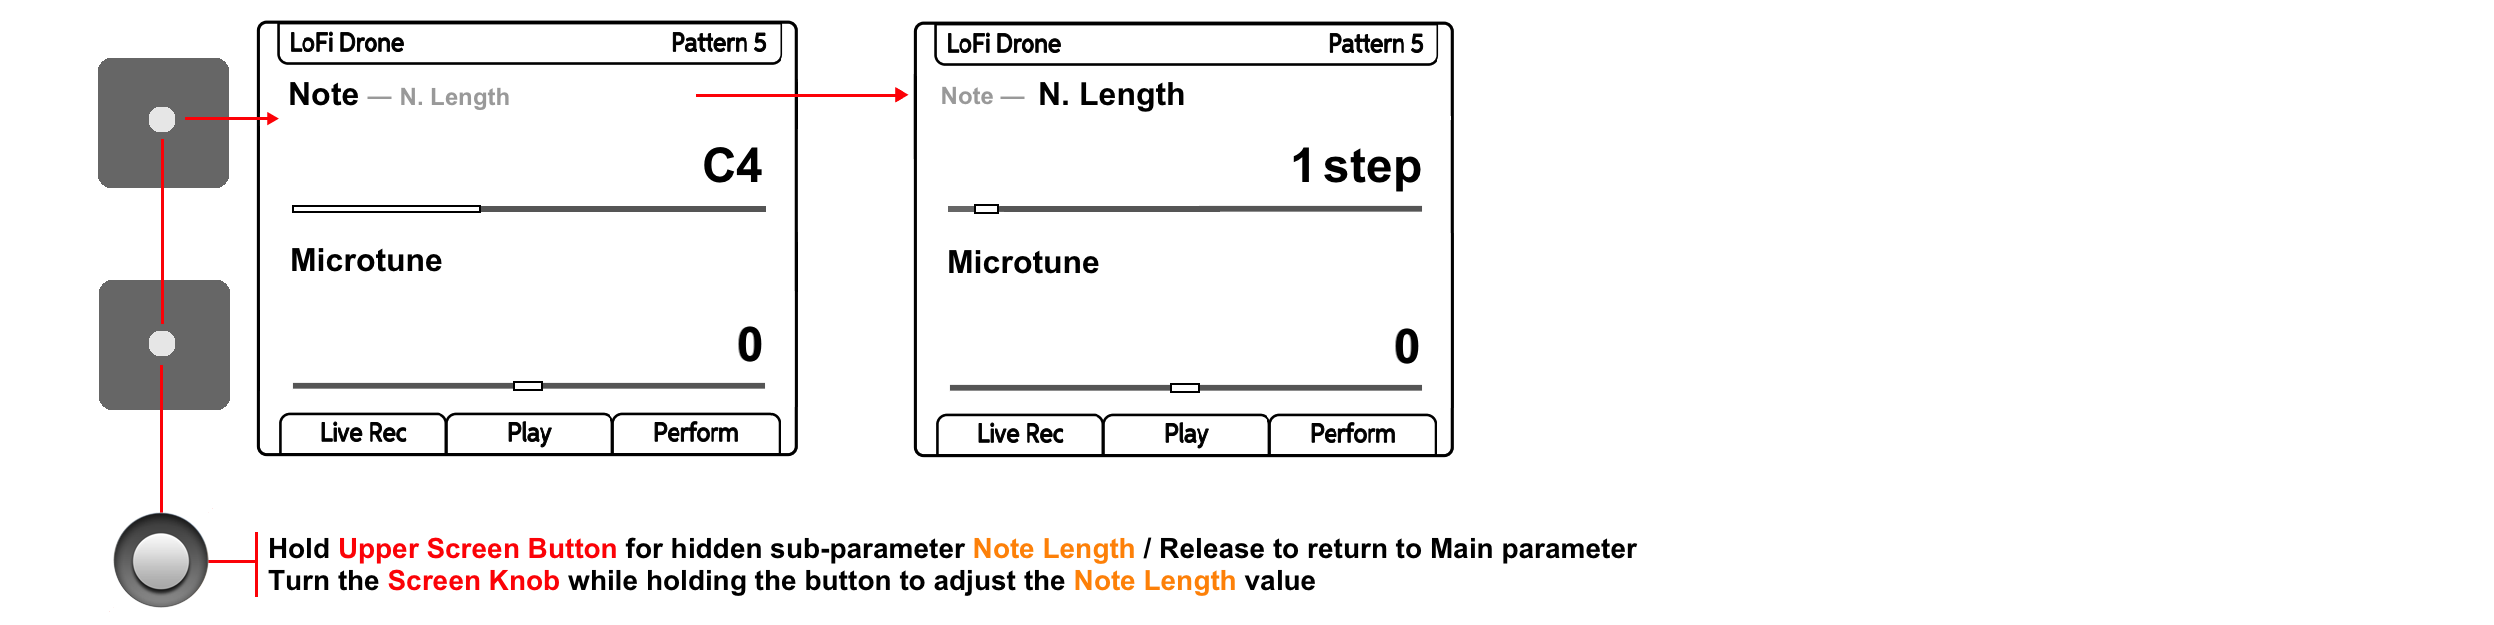
As for the note length and backward compatibility, it’s simple: when loading old projects, the note Length parameter will just be turned off (Off), because projects open in One Shot mode by default. The parameter becomes active only when we manually switch to Gate mode.
Randomization
Sample Start
Polyend Play+ already features combined sample start and end randomization under the “Sample length” preset. However, this combined option does not work for Gate mode. We need an independent sample start randomization — this is crucial for Gate mode, especially when a specific loop direction is selected.
Note Length
Since a new note length parameter is introduced, it should be added to the randomizer type menu.
My main argument for the developers: I’m not trying to reinvent the wheel, and I’m not asking for anything extraordinary that could overload the engine or tank the CPU. I’m asking to use already existing solutions and standard Start and End parameters. The trigger launch command (Note On) is already in the device. All that is required to stop the sound when a pad is released or when the step length ends is simply adding the (Note Off) command.
Most importantly, we do not break the sequencer rule (one step = one event) — this is important.
WORKFLOW
Step 1: Enabling GATE Mode and Selecting Direction
-
Go to the Sample Start / Sample End page.
-
Press and hold the Upper Screen Button in the Sample Start row: the parameter on the screen instantly changes to the hidden Playback Mode sub-parameter.
-
While holding the button, turn the Screen Knob to switch from the default One Shot mode to GATE mode. Release the button.
-
Press and hold the Lower Screen Button in the Sample End row: the parameter on the screen instantly changes to the playback direction sub-parameter.
-
While holding the button, turn the Screen Knob to choose how the sample plays back:
-Forward: starts from the Start point forward, cuts off as soon as we release the held pad / the step length or sample length ends.
-Reverse: starts from the End point backward, cuts off as soon as we release the held pad / the step length or sample length ends.
-Loop: loops continuously between the Start and End points as long as the note / pad is held.
Step 2: Tweaking Note Length
-
Select one or multiple steps on the sequencer grid or select the entire track.
-
Press and hold the Upper Screen Button in the Note / Microtune row: the parameter on the screen instantly changes to the hidden Note Length sub-parameter.
-
While holding the button, turn the Screen Knob to set the duration of individual steps or the entire track in fractions: 0.25, 0.50, 0.75, 1 step, and so on.
-
When playing live on the pads, the note length is recorded automatically based on how long our finger held the pad.
Step 3: Smart Link only for the LOOP playback direction
This trick allows you to turn the loop / window right during live performance or program it step-by-step without breaking its size. And here is our bonus - we get a wavetable synthesizer. Cool?
-
Press and hold the Lower Screen Button in the Sample End row to select the Loop direction.
-
Turn Sample Start to choose the start of the loop.
-
Move Sample End to select the loop end point - this forms a window. The link between the loop start and end points engages, just like in Digitakt 2.
-
Now, when turning only Sample Start, the loop window starts moving forward and backward across the sample while maintaining its size.
-
To reset the link and change the window size, return Sample End all the way to zero or to the maximum.
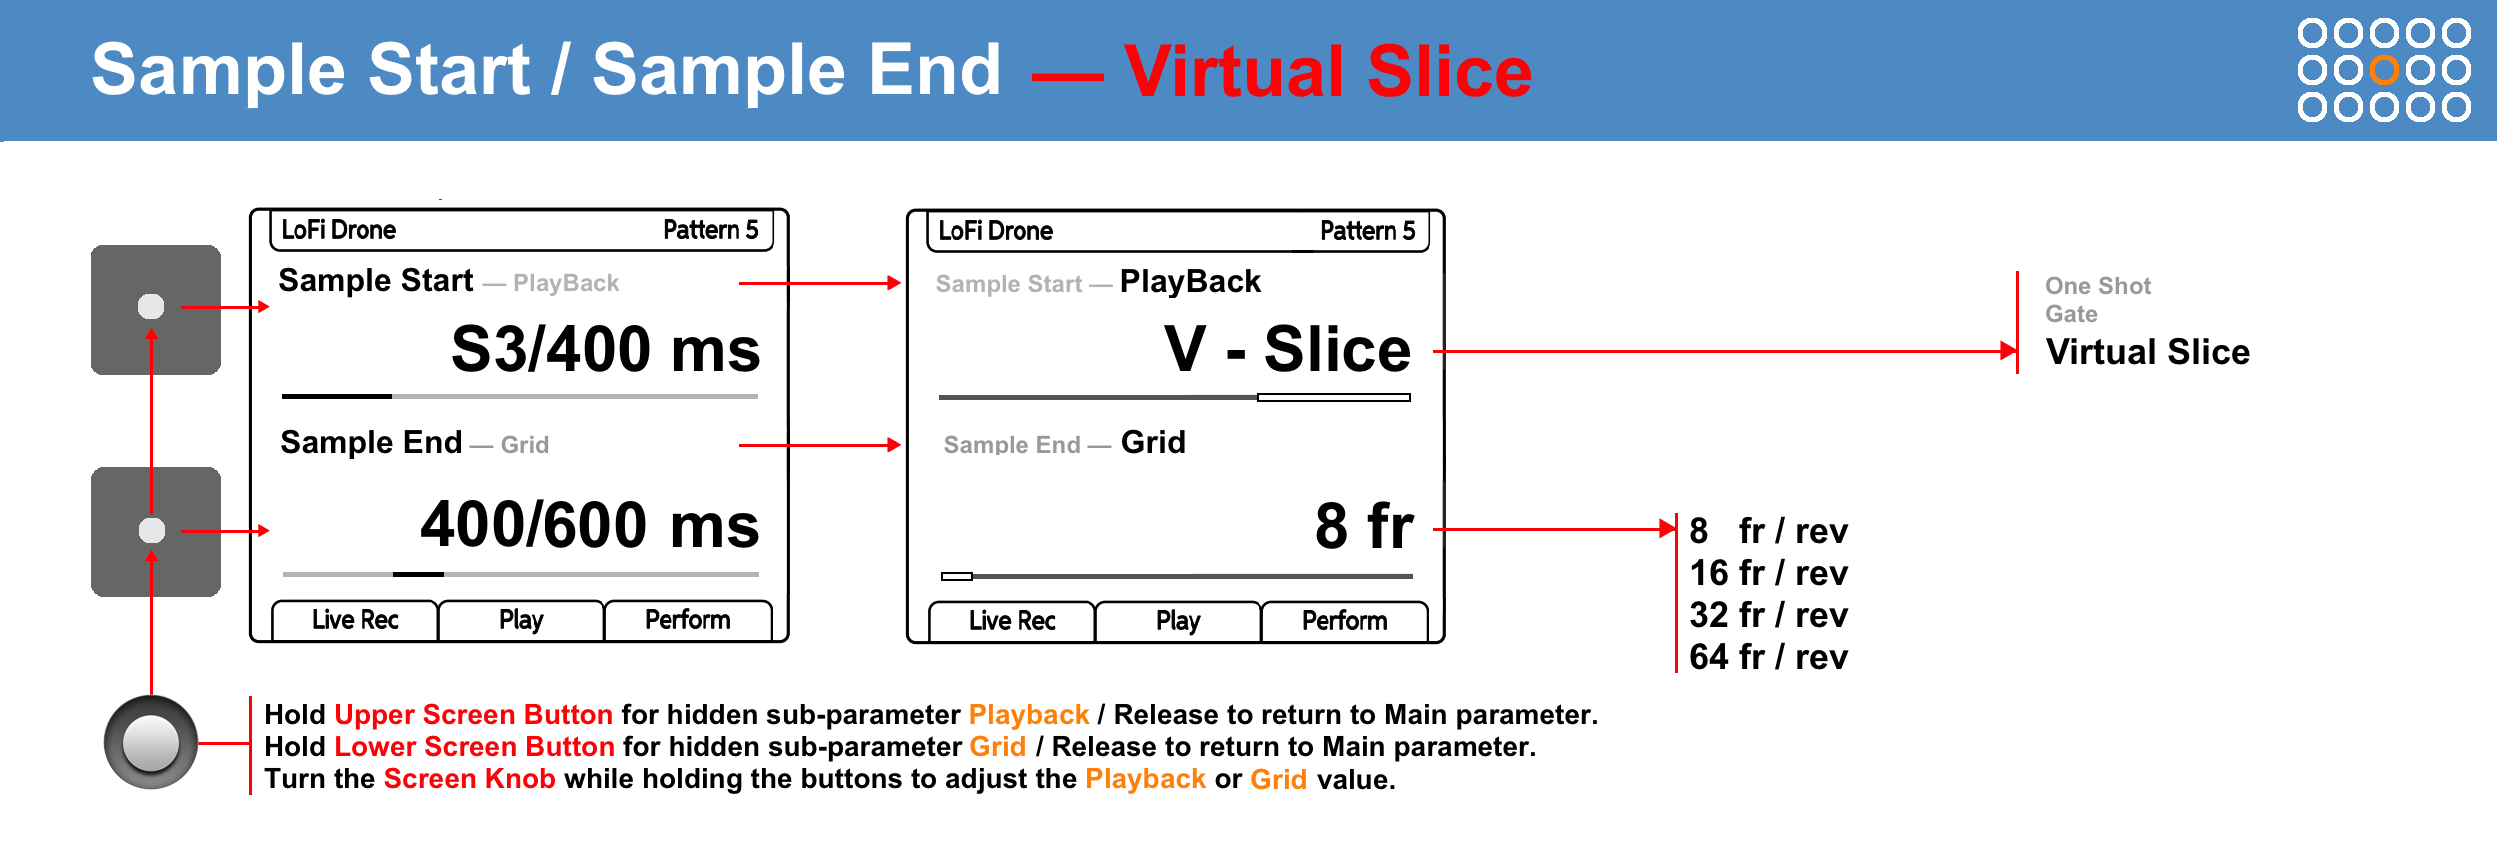
V-SLICE — Virtual Slicing Mode
The trick of this mode is that it places virtual markers inside a sample or loop based on a specified grid, dividing the audio into equal parts. There is no physical cutting and no creation of new separate audio pieces here, and there never can be. As a result, we get a ready-made layout in real time, and we can quickly switch between slice numbers using the Sample Start parameter.
The working principle of such virtual slicing is both simple and brilliant within Polyend Play+. Here is a detailed example for better understanding: let’s say we take a loop with a length of 1600 ms and select a grid of 8 slices. The algorithm automatically divides the total loop length into 8 parts and places markers exactly every 200 ms. The output gives us 8 ready points that we can now instantly jump between. Now the Sample Start parameter serves to switch between virtual markers (S1 / S2 / S3). Meanwhile, the Sample End parameter automatically adjusts to the selected start point, setting the length of the chosen slice. In our case, this is 200 ms. This results in a perfect fixed slice, which can later be easily edited, adjusting the transient and length.
In fact, all of this can be done in Polyend Play+ right now: you have to spend a ton of time, calculate milliseconds manually, catch the beginning of the desired section, and adjust its end. I want to remind you once again that we are not inventing anything new; we are using the existing capabilities and parameters of the groovebox. I am proposing a very simple thing - to automate this process for the sake of speed and convenience when working with loops.
WORKFLOW
Step 1: Selecting Mode and Grid Setup
-
Go to the Sample Start / Sample End parameter page.
-
Hold Upper Screen Button in the Sample Start row, turn Screen Knob to switch the mode from One Shot to V-Slice. Release the button.
-
Hold Lower Screen Button in the Sample End row, turn Screen Knob to choose the grid density and playback direction. Release the button.
- 8 Fwd / 16 Fwd / 32 Fwd / 64 Fwd - number of virtual markers + forward playback.
- 8 Rev / 16 Rev / 32 Rev / 64 Rev - number of virtual markers + backward playback.
Step 2: Entering Steps and Editing Parameters
1. Selecting a slice on a step:
- Hold the desired pad, turn Sample Start and choose the slice number.
- Screen format example: S3/400 ms (where S3 is the slice number, 400 ms is its start point).
2. Adjusting slice length:
- Hold the desired pad, turn Sample End to smoothly change the slice length.
- Screen format example: 400/600 ms (where 400 ms is the lower length limit, 600 ms is the current end point of the slice, which can be either shortened or lengthened).
3. Changing direction on a specific step:
Hold the desired pad with your right hand, and while holding Lower Screen Button with your left hand, turn Screen Knob to change the Grid parameter from Forward to Reverse.
4. Catching the transient:
First, select the steps you want to edit using Shift, then use Shift + Sample Start to smoothly move the slice start point + / - in milliseconds. The slice end point automatically moves along with the start, keeping the window size the same.
5. Changing length by subdivisions:
First, select the steps you want to edit using Shift, then use Shift + Sample End to change the length of the slice itself—only now it jumps instead of moving smoothly. The slice length is divided into musical subdivisions (for example, if the slice is 200 ms, its size will jump down — 100, 50, 25 ms, and up — 400, 600, 800 ms and so on).
Grid Auto-Recalculation
We know that changing the pitch (Note) on the Polyend Play+ changes the sample playback speed. The loop will compress in time (if the pitch is higher) or stretch (if the pitch is lower). To keep the timing and prevent the pattern from drifting, there must be an automatic recalculation of virtual markers proportional to the current pitch.
Randomization + Finger Drumming
• Since we now have the ability to scroll through slices, it would make sense to add a new randomization type to the Randomize Type menu.
• You can do a cool thing by switching to finger drumming mode: pre-assign different slices to the pads and play them like an MPC.
Backward Compatibility
When loading old projects, the V-Slice parameter will simply be turned Off, as projects open in One Shot mode by default. The new mode becomes active only when we switch it manually.
The V-Slice mode strictly follows the Polyend Play+ rule of “one step = one event”. It doesn’t break the logic or the rules of how the sequencer works.